This post describes basic exposure adjustments available in Camera Raw 8. It is part of a series of posts on Adjusting Exposures that begins here.
Adjustments in legacy (i.e., old) versions of Camera Raw are described in Part 2 of the series. The adjustment menu in legacy versions of Camera Raw is different (and to my way of thinking less intuitive). You may run into the legacy adjustment menu even if you are using the latest version of Camera Raw. Newer versions of Camera Raw recognize legacy adjustments that have been saved and switch to legacy adjustment menus when legacy adjustments are encountered.
Except as noted, the top halves of the black-to-white gradient images in this post show effects of adjustments. The bottom halves show the original image. If you’d like try out adjustments yourself, you’ll find the black-to-white gradient image here.
Camera Raw Exposure Adjustments
Figure 1 shows the effect of setting Exposure to +1 in Camera Raw 8. Grays become lighter, but pure black on the left side is preserved. Figure 2 shows the effect of setting Exposure of the black-to-white gradient to -1 in Camera Raw 8. Everything that isn’t already black becomes darker. Pure white on the right side of the image is not preserved.
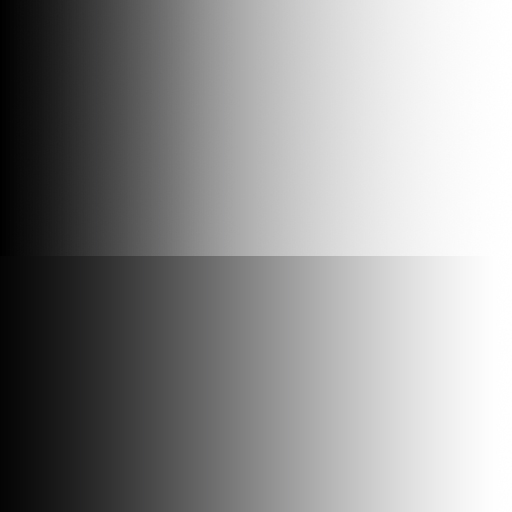
Figure 1. Black-to-white gradient image with Exposure set to +1 in Camera Raw 8.
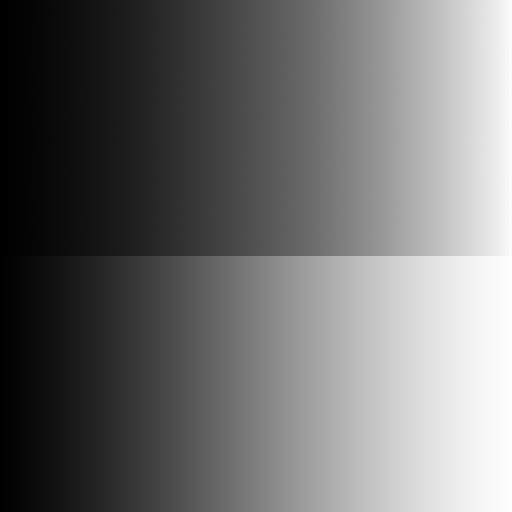
Figure 2. Black-to-white gradient image with Exposure set to -1 in Camera Raw 8.
Exposure adjustments in Camera Raw 8 are consistent with what photographers would expect from camera adjustments. Whites are rendered as grays in photographs that are underexposed because of camera settings.
Camera Raw Contrast Adjustments
Figures 3 and 4 demonstrate the effect of Contrast adjustments in Camera Raw 8. As with legacy versions of Camera Raw, increasing Contrast makes dark grays darker and light grays lighter. Decreasing Contrast makes dark grays lighter and lighter grays darker. In both cases, whites and blacks are preserved.

Figure 3. Black-to-white gradient image with Contrast set to +25 in Camera Raw 8.

Figure 4. Black-to-white gradient image with Contrast set to -25 in Camera Raw 8.
There is very little difference between Contrast adjustments Camera Raw 8 and those in legacy versions.
Camera Raw Highlights and Shadows Adjustments
Figures 5 and 6 demonstrate the effect of Highlights adjustments in Camera Raw 8. Notice that darker grays are affected little by these changes.

Figure 5. Black-to-white gradient image with Highlights set to +25 in Camera Raw 8.

Figure 6. Black-to-white gradient image with Highlights set to -25 in Camera Raw 8.
Adjustments to Shadows have the opposite effect: Darker grays are affected more than lighter ones. Figures 7 and 8 show examples of these adjustments.

Figure 7. Black-to-white gradient image with Shadows set to +25 in Camera Raw 8.

Figure 8. Black-to-white gradient image with Shadows set to -25 in Camera Raw 8.
Camera Raw Whites and Blacks Adjustments
Figures 9 and 10 demonstrate the effects of Whites adjustments in Camera Raw 8. As with Highlights adjustments, darker grays are affected little by Whites adjustments.

Figure 9. Black-to-white gradient image with Whites set to +25 in Camera Raw 8.

Figure 10. Black-to-white gradient image with Whites set to -25 in Camera Raw 8.
The effects of adjusting Blacks with Camera Raw 8 are shown in Figures 11 and 12. It’s no surprise that light grays are little affected by these adjustments.
Figure 11. Black-to-white gradient image with Blacks set to +25 in Camera Raw 8.

Figure 12. Black-to-white gradient image with Blacks set to -25 in Camera Raw 8.
Comparison of Highlights/Whites and Shadows/Blacks Adjustments
It’s challenging to see the difference between adjusting Highlights and adjusting Whites in the previous examples. The differences are clarified by Figures 13 and 14 which show the two adjustments in the same image. As one might suspect from the names, Highlights adjustments affect a broader range of tones than Whites adjustments.
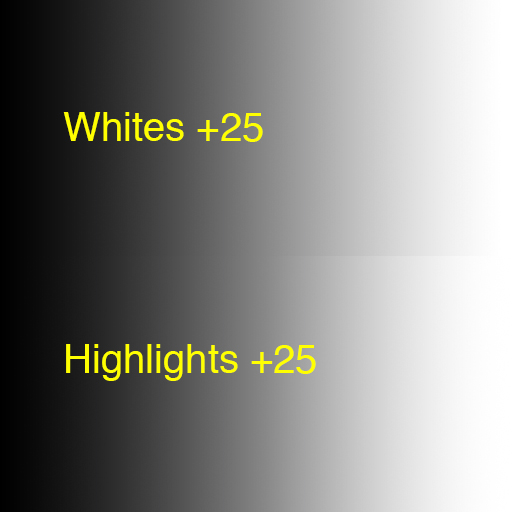
Figure 13. Comparison of Whites and Highlights adjustments to a back-to-white gradient with Camera Raw 8. Both adjustments are +25.
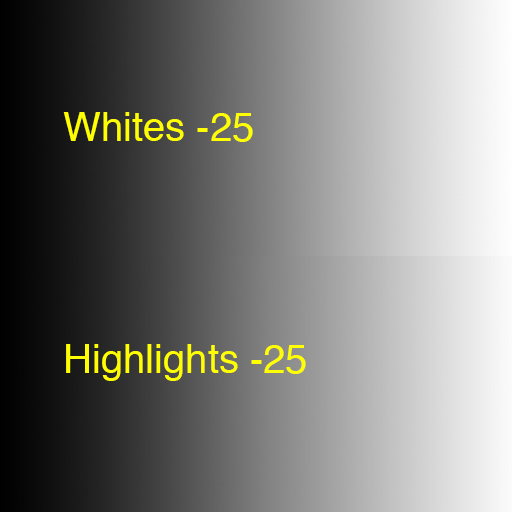
Figure 14. Comparison of Whites and Highlights adjustments to a back-to-white gradient with Camera Raw 8. Both adjustments are -25.
Figures 15 and 16 show compare adjustments to Shadows with adjustments to Blacks. In this case, Shadows adjustments affect a broader range of tones than Blacks adjustments.
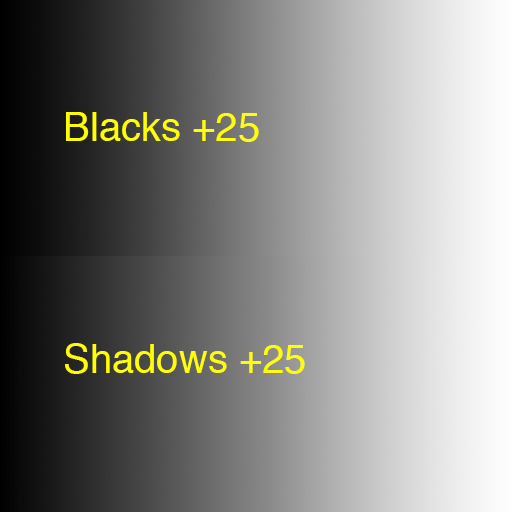
Figure 15. Comparison of Blacks and Shadows adjustments to a back-to-white gradient with Camera Raw 8. Both adjustments are +25.
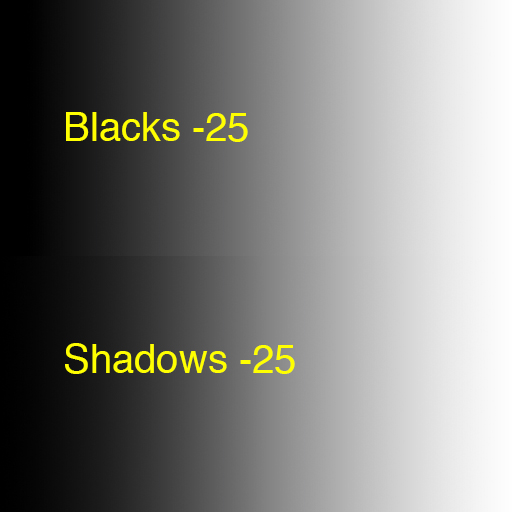
Figure 16. Comparison of Whites and Highlights adjustments to a back-to-white gradient with Camera Raw 8. Both adjustments are -25.
Camera Raw Adjustments to a Photograph
Let’s try some of these adjustments on an actual photograph. As an example, I’ve selected a photograph of a jackrabbit that was taken in flat light on a cloudy day. The unadjusted photograph is shown in Figure 17.

Figure 17. Unadjusted photograph of a jackrabbit.
To some extent, expose adjustments depend on the tastes of the person doing the adjustments. However, a bit of quantitative information can be gleaned from histograms. The histogram associated with this image is shown in Figure 18. Notice that it’s shifted toward darker tones suggesting that the image may be a bit underexposed.
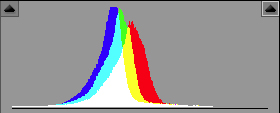
Figure 18. Histogram for the photograph in Figure 17.
Figure 19 shows the effect of setting Exposure to +0.50.
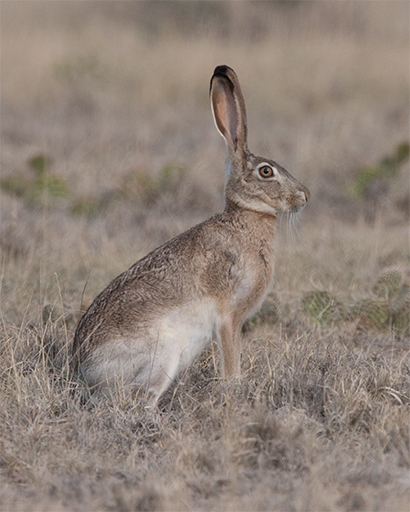
Figure 19. Photograph of the jackrabbit after Exposure has been set to +0.50 in Camera Raw 8.
Figure 20 shows the histogram associated with the photograph in Figure 19. Increasing the exposure spread out the peak a bit and moved it toward brighter tones.
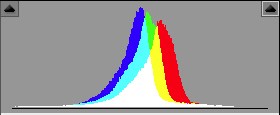
Figure 20. Histogram for the photograph in Figure 19.
Based on the histogram in Figure 20, Exposure could be increased even more without clipping whites. I tried higher values for Exposure but didn’t care for how bright it made the background. Instead I set Contrast to +20. That made the jackrabbit stand out a bit more by emphasizing the contrasting tones in its coat.

Figure 21. Photograph of the jackrabbit after Exposure has been set to +0.50 and Contrast has been set to +20 in of Camera Raw 8.
Next I reduced some of the background brightness by setting Highlights to -25. Figure 22 displays the result.
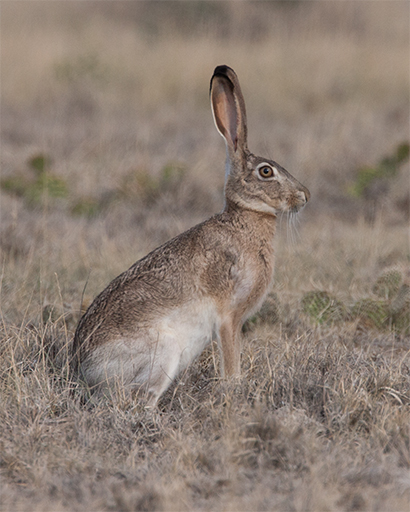
Figure 22. Photograph of the jackrabbit after Exposure has been set to +0.50, Contrast has been set to +20, and Highlights has been set to -25 in Camera Raw 8.
Finally, I attempted to bring out some more detail in light areas of the jackrabbit’s coat by setting Whites to -15. The resulting adjustments are shown in Figure 23.
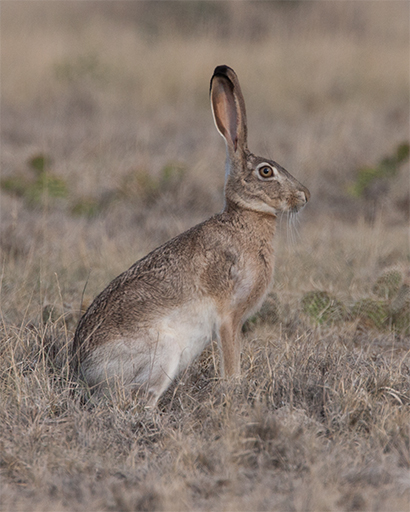
Figure 23. Photograph of the jackrabbit after Exposure has been set to +0.50, Contrast has been set to +20, Highlights has been set to -25 and Blacks has been set to -15 in Camera Raw 8.
You can click on the jackrabbit photos to display larger versions that may be easier to compare with each other than those embedded in the text.
One can spend an inordinate amount of time seeking optimal adjustments. I don’t claim that my adjustments are optimal or even that such a thing as optimal adjustments exits, but to my eye the final version is an improvement over the original. Feel free to download the original image and see if you can find better adjustments yourself.
In my next post I’ll discuss the Exposure and Brightness/Contrast adjustments in Photoshop.