This post is part of a series of posts on Adjusting Exposures. The series begins here.
When images in this post have nearly identical top and bottom halves, top halves show effects of adjustments and bottom halves show the original image.
Shadows/Highlights Adjustments in Photoshop
When we look at a scene, we can see details in both bright and dark areas that photographers can’t pick up in a single image. If the exposure is set to pick up details in bright areas, details are lost in dark areas. If the exposure is set to pick up details in dark areas, details are lost in bright areas. Scenic photographers can deal with this problem by taking several photos with different shutter speeds and combining them with software for creating high dynamic range (HDR) images.
Wildlife photographers rarely have the luxury of taking multiple photographs of the same image. They have to find other ways to bring out details in both bright and dark areas of their photos. One approach is to mask adjustments that bring out details in shadows so they apply only to dark areas of a photo and mask adjustments that bring out details in highlights so they apply to only dark areas of a photo.
Manual creation of masks can be difficult and tedious. The Shadows/Highlights adjustment attempts to simplify the process by combining automatic mask creation with exposure adjustments. It’s accessed though the command Photoshop command menu at Image / Adjustments / Shadow/Highlight… Figure 1 shows the adjustment menu.
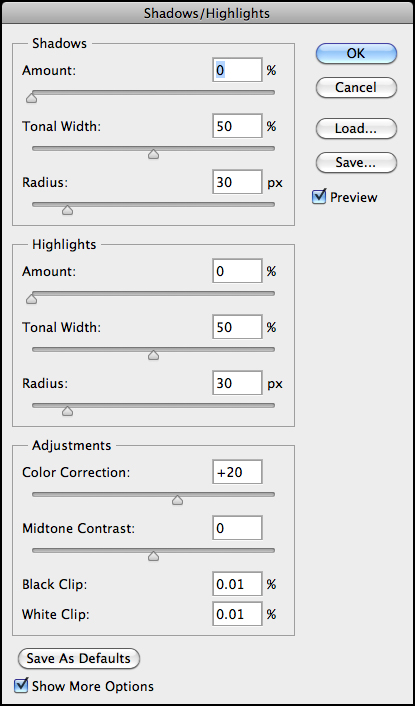
Figure 1. The Shadows/Highlights adjustment menu.
These following adjustments are possible:
- Amount determines the amount of the adjustment. For shadows it’s the amount of lightening. For highlights it’s the amount of darkening. (Photoshop CC defaults: Shadows Amount: 35%; Highlights Amount: 0%).
- Tonal Width specifies the range of tones affected by the adjustment. A low tonal width for shadows means that only the darker areas of the image will be affected. A low tonal width for highlights means that only the lighter areas of the image will be affected. As tonal width is increased more mid-tone regions are affected. (Photoshop CC defaults: 50%).
- Radius controls the size of the area used to determine whether a pixel is in a shadow or a highlight. If the shadows amount is non-zero, all pixels in a shadow area are lightened. If the highlights amount is non-zero, all pixels in a highlight area are darkened. The optimum radius depends on the nature of shadow and highlight areas and the size of the image. Increasing Radius softens the edges of affected areas. Decreasing Radius sharpens them. (Photoshop CC defaults: 30 px).
- Color Correction changes the saturation of colors modified by Shadows/Highlights. Brightening dark pixels or darkening bright pixels may introduce “hidden” colors. (Photoshop CC default: +20).
- Midtone Contrast adjusts the contrast of mid-tones. (Photoshop CC defaults: 0).
- Black Clip and White Clip set absolute black or absolute white for a Levels adjustment that Shadows/Highlights makes prior to making other adjustments. These values set the amount of clipping you are willing to tolerate for that adjustment. Setting both values to 0 turns off the Shadows/Highlights Levels adjustment. (Photoshop CC defaults: 0.01% for both).
Notice that Show More Options is checked. If it is unchecked, only the Amount sliders are displayed.
Tip: I always convert layers to Smart Objects with a Layer / Smart Objects / Convert to Smart Object command before manipulating them with Shadows/Highlights adjustment. This allows me to go back to examine or modify the Shadows/Highlights settings later. If I leave the layer as a Smart Object and save the file as a Photoshop document, the recoverable and modifiable Shadows/Highlights settings get saved with the file.
Let’s see what Shadows/Highlights does with at the high-contrast contrived spider graphic that I used to demonstrate some of the deficiencies of the Levels adjustment. The image is displayed again in Figure 2.

Figure 2. A contrived spider graphic with subtle detail in both dark and light areas.
The effect of setting Shadows and Highlights Amounts to 100% and leaving other settings at Photoshop CC defaults produces the image in Figure 3. (Setting Shadows/Highlights Amounts to 100% is rarely appropriate for photographs. I’ve used these settings here to maximize some of the effects.)
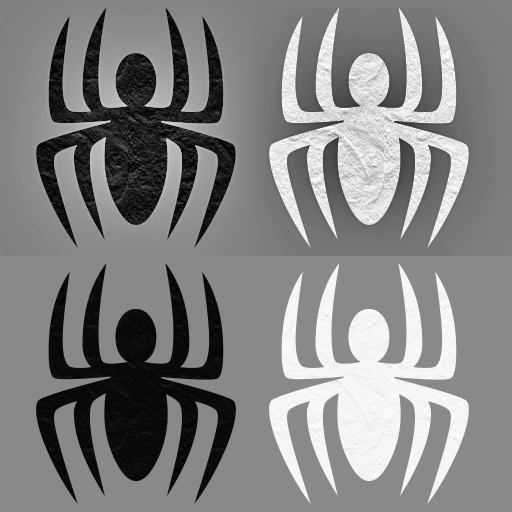
Figure 3. The top half of the image shows the effect of modifying the spider graphic in Figure 2 with Shadows/Highlights. Shadows and Highlights Amounts are set to 100%. Other settings are left at Photoshop CC defaults. The bottom half of the image is unadjusted.
To a limited extent the adjustment worked: Shadows/Highlights enhanced detail in both dark and light areas of the image in Figure 3. However, there are problems with the background. The dark spider is surrounded by a halo. The light spider is surrounded by a shadow.
Halos around shadows and shadows around highlights are difficult to avoid completely when images are adjusted by Shadows/Highlights, but they can be minimized by reducing Amounts or Tonal Widths and modifying Radius adjustments. The best values for these parameters depend on the image being treated and personal taste. Generally, Amounts and Tonal Widths should be set to minimize unwanted effects on mid-tones. Some authors suggest that a good rule of thumb is to set the Radius to the size of the shadow and highlight areas that you are trying to emphasize. A better rule may be to apply Radius settings to values that depend on the sharpness of transitions between mid-tone areas and shadows or highlights. A small radius works well for for sharp transitions. A larger radius is better for more gradual transitions.
Transitions between mid-tones and shadows or highlights in my contrived example are about as sharp as you’ll ever come across. I found that when I left Amounts at 100%, Radius settings of 0 worked well. When Radius settings were 0, I was able to leave Tonal Widths at fairly high values: 50% for the Shadows Tonal Width and 41% for the Highlights Tonal Width. The result of these adjustments is shown in Figure 4.
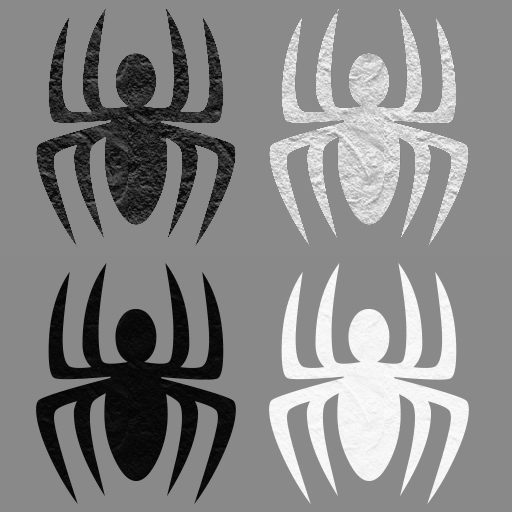
Figure 4. Effect of modifying the spider graphic in Figure 2 with Shadows/Highlights. Shadows and Highlights Amounts are 100%, Shadows Tonal Width is 50%. Highlights Tonal Width is 41%. Radii are 0 px, which seems appropriate for the extremely sharp transitions between shadows, highlights and mid-tones.
Let’s look at an example in which transitions between shadows an highlights are more gradual. I altered the spider graphic to demonstrate the effects of Shadows/Highlights when the edges of shadows and highlights are less well defined. The altered graphic is shown in Figure 5.
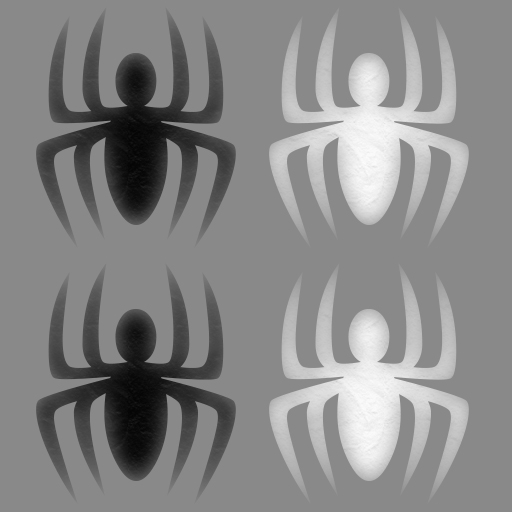
Figure 5. An altered spider graphic in which edges of shadows and highlights are less well defined.
One might expect that the Shadows/Highlights adjustments that created Figure 4 from original spider graphic in Figure 2 would also work well for enhancing the shadows and highlights in the altered spider graphic in Figure 5. The result of applying these adjustments to Figure 5 is shown in Figure 6.

Figure 6. Effect of modifying the altered spider graphic in Figure 5 with Shadows/Highlights. Shadows and Highlights Amounts are 100%, Shadows Tonal Width is 50%. Highlights Tonal Width is 41%. Radii are 0 px.
The adjusted image is both dramatic and interesting, but probably not representative of the kind of enhancement one usually seeks for photgraphs. Two things cause the bizarre effects: Background mid-tone pixels get dragged into adjustments because Tonal Widths are too high, and zero values for Radii make transitions from background mid-tones to shadows and highlights too abrupt.
Figure 7 a Shadows/Highlights adjustment to the altered spider graphic in Figure 6 with parameters set to more appropriate values.
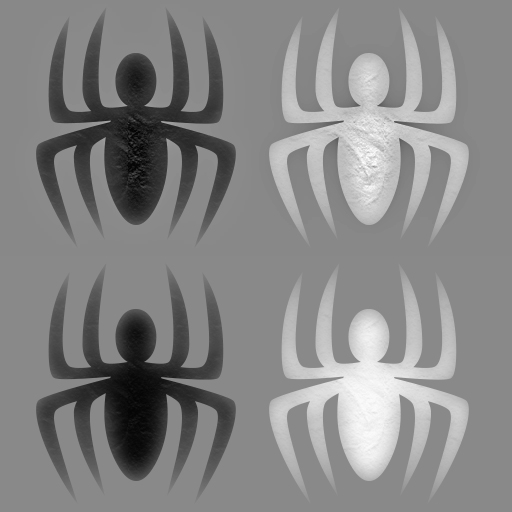
Figure 7. Effect of modifying the altered spider graphic in Figure 5 with Shadows/Highlights with parameters set to values more appropriate to the image. Shadows and Highlights Amounts are 100%, Shadows Tonal Width is 25%. Highlights Tonal Width is 15%. Radii are 11 px. Residual effects on the background were reduced by setting Midtone Contrast to +18.
The result shown in Figure 7 is not perfect. A bit of haloing and shadowing is evident in sharp corners. Decreasing Radius values would reduce these effects at the expense of loss of more detail in shadows and highlights.
Shadows/Highlights Adjustments to a Photograph
Figure 8 is a photograph of Milkweed Longhorn Beetles that was taken with a macro lens and ring-light flash. The background, which is further from the flash, is dark and poorly lighted. The milkweed seed pod and particularly the stem leading to it are perhaps too brightly lighted.

Figure 8. Unadjusted photograph of Milkweed Longhorn Beetles.
Figure 9 shows a version of the Milkweed Longhorn Beetles photograph adjusted by Shadows/Highlights settings of Shadows Amount: 10%; Shadows Tonal Width: 50%; Shadows Radius: 13px; Highlights Amount: 20%; Highlights Tonal Width 50%; and Highlights Radius: 7px.
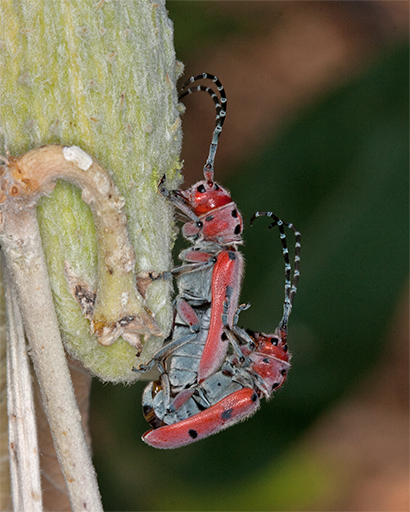
Figure 9. The Milkweed Longhorn Beetle photograph from Figure 8 after Shadows/Highlights adjustments.
Tip: Shadows/Highlights adjustments create histogram combing effects similar to those created by Levels adjustments. These effects can be minimized by loading raw files as 16-bit images instead of 8-bit images. See my post of Levels adjustments for more detail.
Tip: Appropriate values for Radius parameters scale with image size: Large Radii for larger images; smaller Radii for smaller ones. Subtle changes is results make selecting appropriate values for Radius parameters tricky. One way to deal with this problem is to set Amount to 100% while selecting the corresponding Radius and then reduce Amount to a more reasonable value once that Radius has been established.
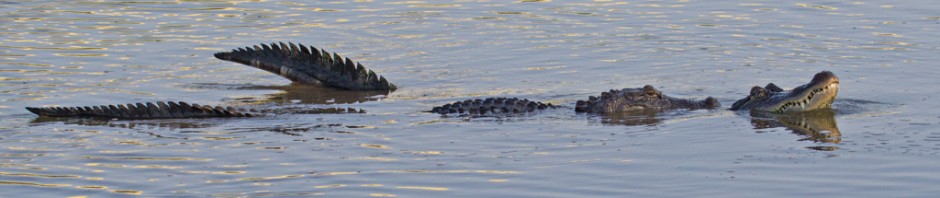
Figure 10 is a photograph of an American Beaver that was taken with a long lens late in the afternoon. Sun shining on the wake created as the beaver was swimming to the east creates some distracting glare that can be toned down with Shadows/Highlights.
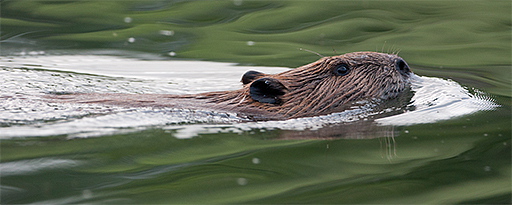
Figure 10. Unadjusted photograph of an American Beaver.
Figure 11 shows a version of the American Beaver photograph adjusted by Shadows/Highlights setting of Shadows Amount: 15%; Shadows Tonal Range: 50%; Shadows Radius: 20px; Highlights Amount:: 30%; Highlights Tonal Range: 50%; and Highlights Radius: 7px.

Figure 11. American Beaver photograph from Figure 10 after adjustment with Shadows/Highlights.
It’s worth stating again that Shadows/Highlights adjustments to a pixel’s tone depend on where that pixel is located. The pixel will be treated differently if it’s surrounded by dark pixels than if it’s surrounded by light pixels. In the absence of masking, all other adjustments to a pixel’s tone depend only on what that tone is. In the next post return to talking about Curves — an adjustment that allows a great deal of flexibility in determining how various tones get adjusted.